1 bước trong 1 phút
Giới thiệu
Happy Sunday!! Enjoy!!
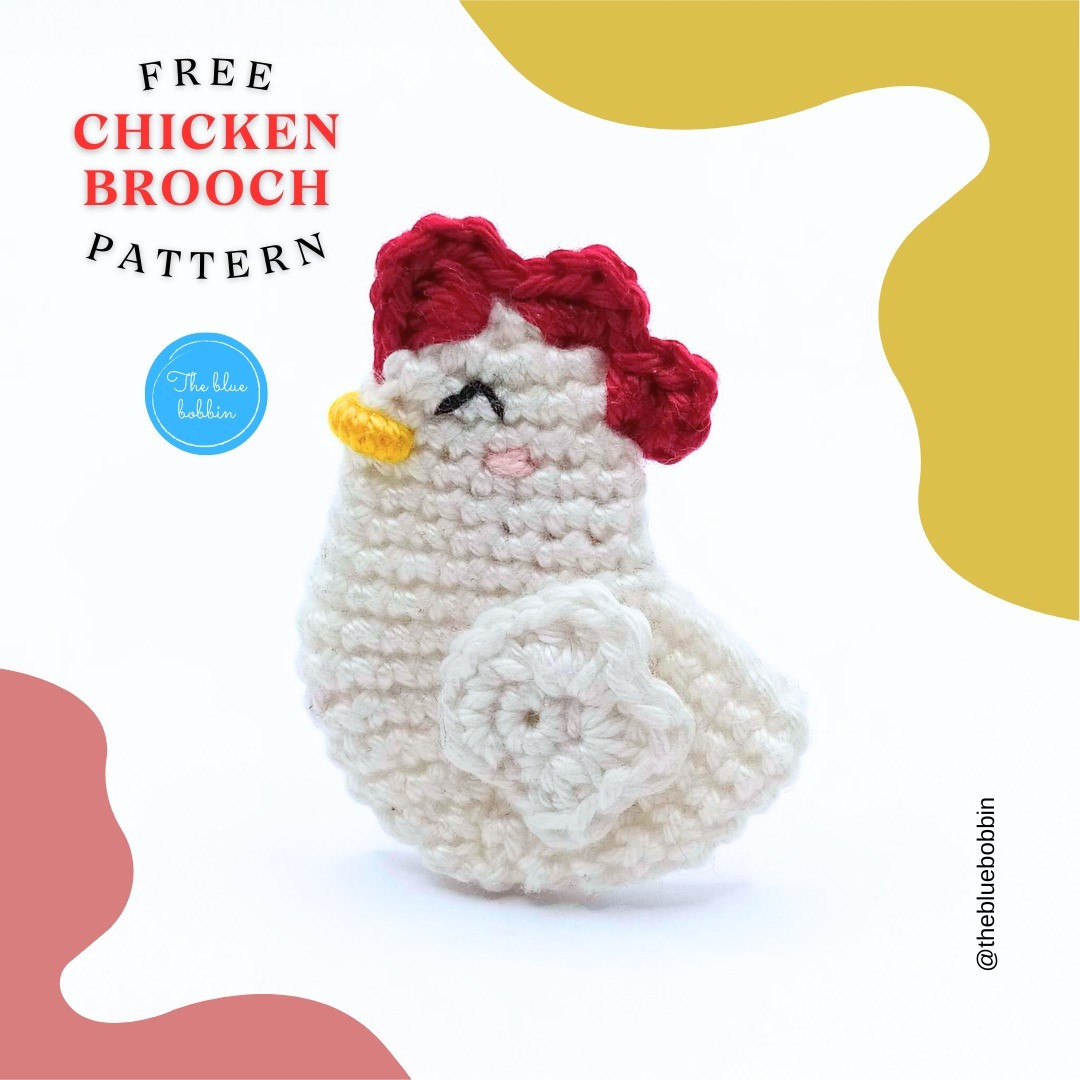
Head & body (with white) do not stuff
Rnd 1. 6 sc in a mr (6)
Rnd 2. [inc] x 6 (12)
Rnd 3. [3 sc, inc] x 3 (15)
Rnd 4-7. (4 rnds) 15 sc (15)
Rnd 8. Sc, ch 7, starting from the 2nd ch from the hook make 6 sc, continue now crocheting in the round making 6 sc, inc, 7 sc (22)
Rnd 9. Sc, start working on the other side of the ch and then around the rest sts of the rnd, make 6 sc on the ch, 12 sc, [inc] x 2, 7 sc around the rest sts to finish the rnd (30)
Rnd 10. 30 sc (30)
Rnd 11. [8 sc, dec] x 3 (27)
Rnd 12. [7 sc, dec] x 3 (24)
Rnd 13. [6 sc, dec] x 3 (21)
Rnd 14. [5 sc, dec] x 3 (18)
Rnd 15. [1 sc, dec] x 6 (12)
Rnd 16. [dec] x 6 (6)
FO, leave a long yarn tail to close the hole and sew the safety pin later.
Wing (with white)
Rnd 1. 6 sc in a mr (6)
Rnd 2. [sc, 2 dc, hdc] x 3, [inc] x 3
Sl st into the first sc of the rnd
FO and leave a long tail for sewing. Sew the wing approx. between rnds 7 and 15.
Comb (with red)
With the chicken completely flat put your hook between rnds 3 and 4 at the back of the head and attach your yarn, ch 1 and in the same st you attached your yarn into work the following sts: sc, hdc, dc, hdc, sc. Put your hook between rnds 1 and 2 and in this st work the following sts: sc, hdc, dc, hdc, sc. Now put your hook between rnds 1 and 2 but this time at the front side of the head and in this st work the following sts: sc, hdc, 2 dc, hdc, sc. To finish go between rnds 3 and 4 at the front side of the head and make a sl st.
FO and hide the yarn tail inside your work.
Beak (with yellow)
First embroider 2 horizontal sts at the front side of the head below the comb, between rnds 4 and 5, 4 sts long and then with the help of your needle wrap the yarn around those sts until they are covered from one side to the other.
Eye (with black)
Split your yarn in half to get a thinner thread and embroider an eye between rnds 2-4, 2 sts long.
Cheek (with pink)
Embroider the cheek between rnds 4-5, 2 sts long.
How to sew the safety pin
To fix the safety pin at the back of the chicken make a few sts on the top and bottom of the pin.
Then sew along the side of the safety pin, that always stays closed, with a few sts to make it more stable.
Chuẩn bị


More ideas